I got this cute little girl's sweater in a bag of hand-me-downs. Unfortunately it had a stain right in the middle of the chest. I was bummed because I really liked the colors and the stripes on the sweater. Then I had an idea.

I turned the sweater inside out and realized that the knit was just as beautiful on the inside as it was on the outside....and the stain had not penetrated all the way through. That meant I could still use the fabric from the sweater for something. I decided to try my hand at making a drawstring tote bag/backpack for my niece.

I decided that since the sweater was her size it would automatically make the backpack the right size for her back. So I started by cutting off the arms and neck of the sweater, reducing it to two simple rectangles.

Then I cut two pieces of a coordinating cotton print for the lining. (The sweater wouldn't maintain it's shape with anything in it without a lining.)
 I used some more scraps of the cotton to make tabs for the bottom of the bag. I folded up squares and sewed along two sides.
 Then I pinned the little triangle tabs into the bottom of the bag and seamed it all up together (right sides together with the tabs sandwiched in between).
 Next I had to put grommets into each tab. I bought grommets and a grommet setter at the fabric store and installed them according to the package directions. (If you've never done it before I do recommend practicing on some scraps. I had about 1 out of every 4 I tried turn out correctly when I first started.)
 On to the lining: With right sides together I seamed three sides of the lining, leaving the top open and turning over 1/2 an inch.
 I then slid the lining into the sweater bag.
Next it was time to make the band for the top. I cut a long strip of fabric and folded it lengthwise. I needed multiple layers to put the grommets through so that I could be sure they wouldn't pull out. I also wanted nice clean edges on the inside and outside of the bag.
 I pinned the band to the top of the bag and marked where the grommets should be on each side. (They need to be equally spaced, one on each side of the bag.) I then took the band back off of the bag and installed the grommets. (Remember, the grommet does not go through both sides of the folded band, only one side. The band is the pocket for your drawstrings.)
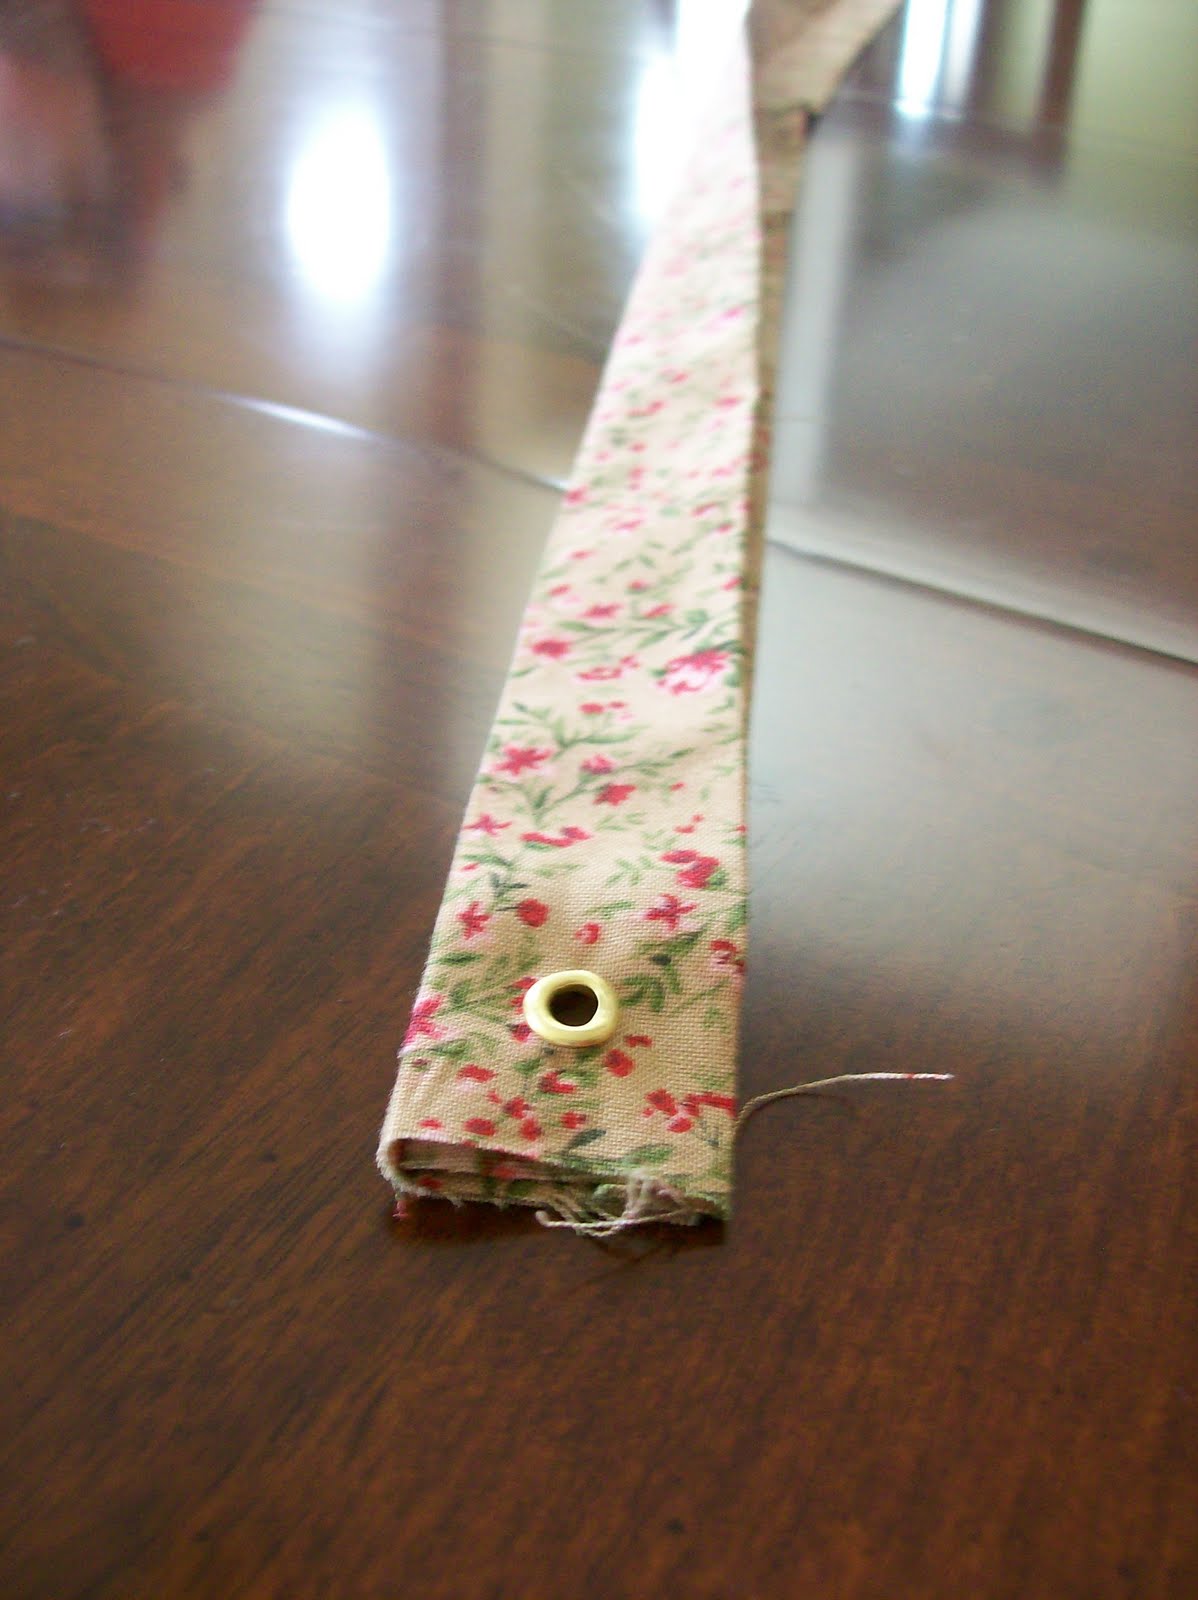
Then I just sewed the band to the top of the bag, catching the ends of the lining and the sweater inside the band. After that it was time to put the drawstrings in.

This was a little complicated to figure out. Actually, I had to call a friend and have her look at her son's drawstring bag and explain to me over the phone how all of the strings went through the band.
You will need two long strings. Each string should go in to the band on one side of the bag, travel all the way around the bag and back out THE SAME HOLE that it went in. (One string entering and exiting on one side, the other string entering and exiting on the other side.)
Then one end of the string on each side needs to go through the hole in the tab at the bottom. Take the ends of the strings and tie them in a knot near the bottom tab.
Then one end of the string on each side needs to go through the hole in the tab at the bottom. Take the ends of the strings and tie them in a knot near the bottom tab.
 That's it! It was a really simple project and a great way to use up old sweaters and fabric remnants. It would be an even easier project if I hadn't used a sweater. A sturdier, tighter knit fabric would not have needed a lining. With a simple canvas fabric you could just hem the top and run your drawstrings right through there, eliminating the need for a band. I may make a couple more of these bags using different fabrics to see how it goes.
For now, I hope Gracie enjoys her 4th Birthday present. Kinley didn't want to let it go.


2 comments:
Gracie loves her bag! We got it yesterday and immediately she wanted me to pack it for her for "school". She put a baby doll in and I added a sandwich and sippy of milk. She went to her room for "school" and had her lunch at her little table. When Rob got home at 10pm or so, he went in to cuddle her. She showed him her new bag first thing. :-) Thanks so much. You did a great job on it. Thanks to Kinley, too, for letting it go.
I love this idea and what a GREAT!!! gift.
THANKS!!! for sharing.
Geri
Post a Comment