Showing posts with label Sewing. Show all posts

Thursday, December 22, 2011

Applique Shirts

When I spotted these cute orange, brown and pink prints at Joann's Fabrics I had to find a project to make with them. (I always do that. The fabric proceeds the project for me.) I made one skirt for Kinley and then decided to make a few more.
These are headed to Pennsylvania for my nieces, who like to dress in coordinating outfits. I decided the skirts weren't quite enough so I dove into applique land for the first time and made coordinating shirts. It was easy enough once I got the hang of it.

I printed out letters the right size, traced them onto the fabric, put them on an iron-on transfer, cut them out and then ironed them on to the shirts. After that I set my machine for a zig zag stitch and just outlined each letter....slowly.

Then inside corners were hardest for me, but I eventually got the hang of it. I'm really happy with the way they turned out. Plus, doing the shirts allows my nephew to have something that coordinates with the girls too.

The other little touch that I love about these outfits is that the two oldest kids got the capital letters and the two younger kids got the lower case letters. So cute!

I'm conisdering making the same outfits for my 3 other nieces in Florida so that even though we live hundreds of miles apart we could take pics of the kids and put them all in one frame and they'd all match. It'd be a great gift idea for my mom. We'll see. ;)


Friday, December 16, 2011

May the Force Be With You

It would be an understatement to say that our house is full of Star Wars fans, so when my fabulous friend Noel said she found some awesome Star Wars hat patterns and we were the first nerds she thought of, we were honored. When I saw these two AMAZING hats I was more than honored....I was thrilled. I just can't wait to see these on the kids and see the looks on their faces on Christmas morning when they open them.

My favorite part is the hair in Yoda's ears. LOVE IT!!


T-Shirts Everywhere!

Ryker is sentimental. He never wants to get rid of anything. Everything has special meaning to him...even t-shirts that are too small.


You know the t-shirts kids get at every sports camp, church camp, little league team, church program, and every other event in between? Yeah, he wants to keep them all. Forever.


He also thinks he can wear them. Forever.


He doesn't want me to pass them down to Cainan, or sell them at a yard sale, or give them away to needy children. I refuse to let him wear them anymore and I can't stand to have them piling up in the closet. Forever.


So.....


The T-Shirt Quilt


12 shirts, two yards of wide fabric for the strips in between and the backing, a roll of batting and some quilt binding. Tah-dah!

I think he'll either be super excited that he can keep his favorite shirts forever OR he'll be devastated that I cut them up. We'll see what happens on Christmas morning.

The 30 Minute Skirt

I made these two skirts for Kinley this year for Christmas. I still have to make the coordinating leggings and hair accessories but the skirts are the main attraction.The pink and orange one is just cotton with hidden seams but the blue one is made from leftover t-shirts, and since its knit I left the seams exposed.


Seriously. This is the easiest skirt I've ever made.

Three strips of fabric. One hem. One elastic waistband.

The hardest part is figuring out how long each piece should be, but Ashley at Make It and Love It has great diagrams and equations to help you get it just right.

Be sure to like her Facebook page to keep an eye on everything great she makes....and loves. )

Tuesday, February 1, 2011

Snow Day Reversible Bag

The big ice storm led to a day of being stuck inside which inevitably led to sewing. On the top of my list was a cute reversible bag I found the free PDF for over at Sew Mama Sew.

I can use it with the flowery side out or... ...with the cool graphic print side out. All I have to do is un-pin the flower button and flip the whole thing inside out. Either way I've got the polka-dots!
Of course Kinley had to have a little one to match.

This is a close up of the three fabrics I used and my first ever attempt at making my own bias tape.
I should have put something else in the pic to give you an idea of the dimensions. The regular sized bag measures approx. 12 inches high and 14.5 inches wide at the top. Go grab your own free pattern and make one for yourself!

Friday, November 20, 2009

Transformation

Welcome to my first ever sewing tutorial! (It may be my last because it takes twice as long to make something when you have to keep stopping and taking pictures of it.)


I got this cute little girl's sweater in a bag of hand-me-downs. Unfortunately it had a stain right in the middle of the chest. I was bummed because I really liked the colors and the stripes on the sweater. Then I had an idea.


I turned the sweater inside out and realized that the knit was just as beautiful on the inside as it was on the outside....and the stain had not penetrated all the way through. That meant I could still use the fabric from the sweater for something. I decided to try my hand at making a drawstring tote bag/backpack for my niece.

I decided that since the sweater was her size it would automatically make the backpack the right size for her back. So I started by cutting off the arms and neck of the sweater, reducing it to two simple rectangles.


Then I cut two pieces of a coordinating cotton print for the lining. (The sweater wouldn't maintain it's shape with anything in it without a lining.)

I used some more scraps of the cotton to make tabs for the bottom of the bag. I folded up squares and sewed along two sides.

Then I pinned the little triangle tabs into the bottom of the bag and seamed it all up together (right sides together with the tabs sandwiched in between).

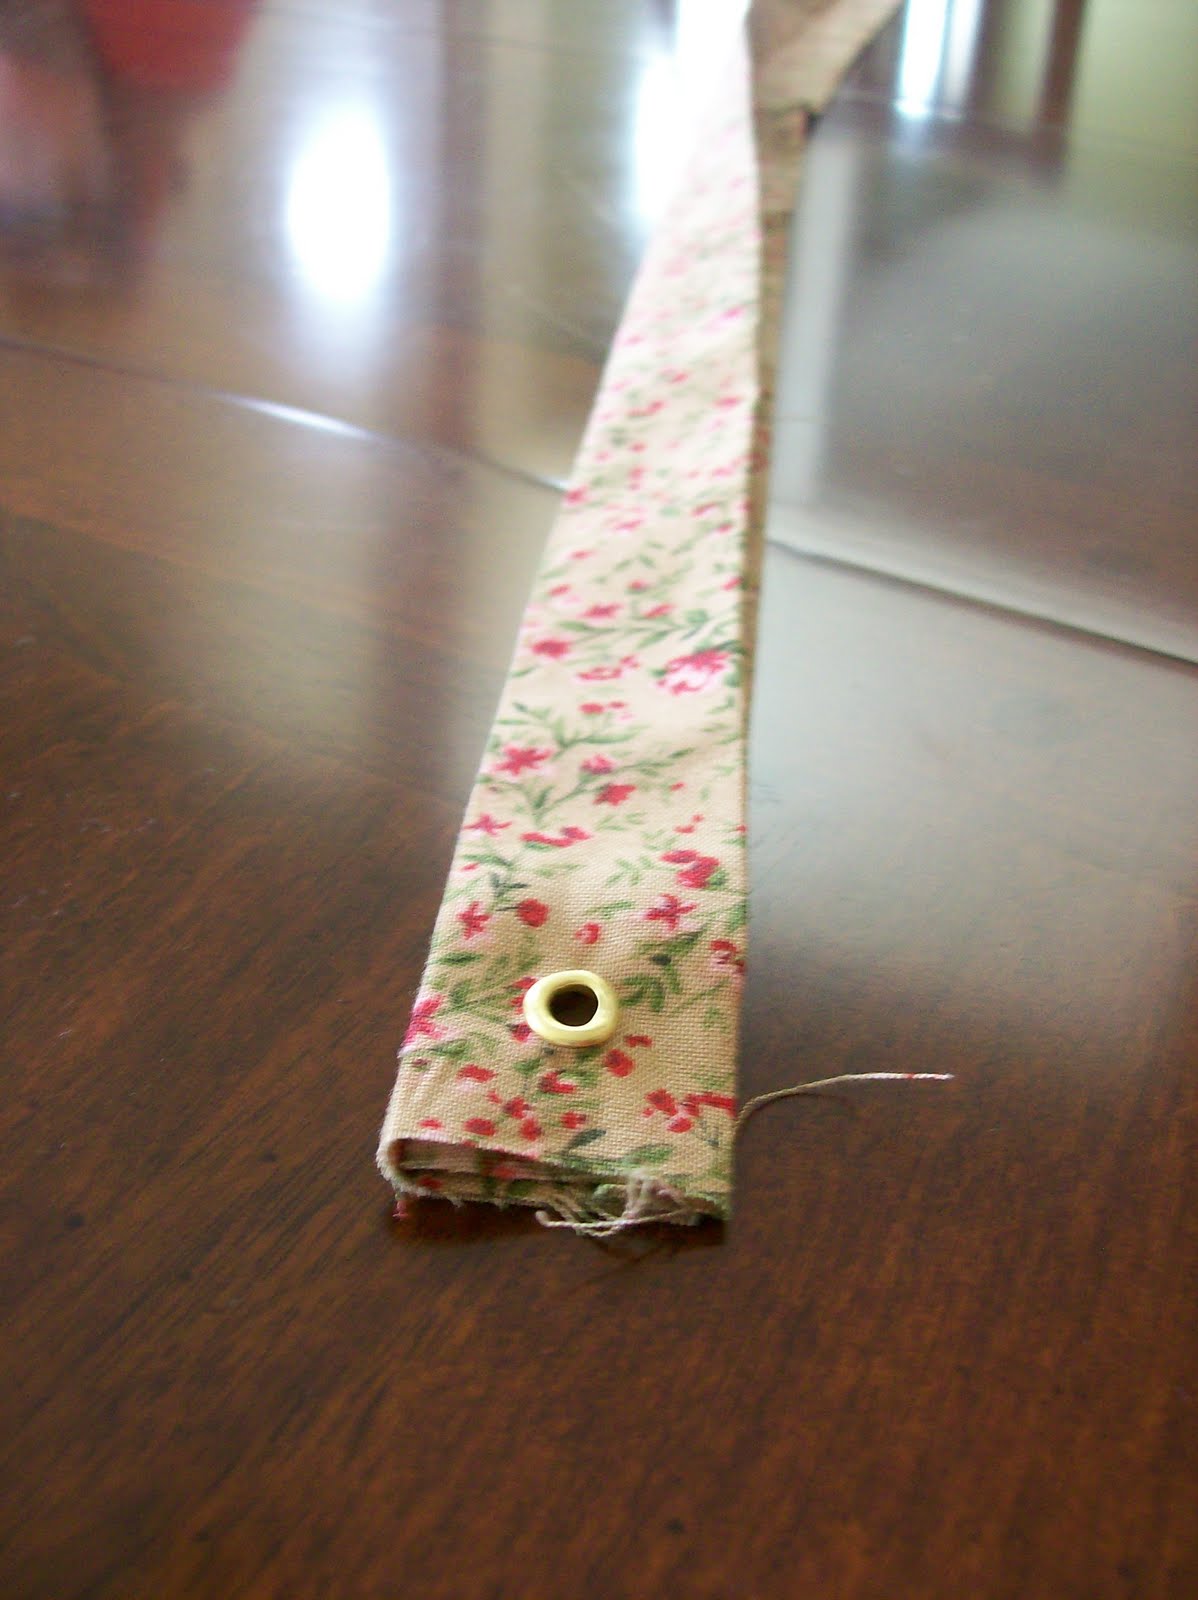
Next I had to put grommets into each tab. I bought grommets and a grommet setter at the fabric store and installed them according to the package directions. (If you've never done it before I do recommend practicing on some scraps. I had about 1 out of every 4 I tried turn out correctly when I first started.)

On to the lining: With right sides together I seamed three sides of the lining, leaving the top open and turning over 1/2 an inch.

I then slid the lining into the sweater bag.

Next it was time to make the band for the top. I cut a long strip of fabric and folded it lengthwise. I needed multiple layers to put the grommets through so that I could be sure they wouldn't pull out. I also wanted nice clean edges on the inside and outside of the bag.
I pinned the band to the top of the bag and marked where the grommets should be on each side. (They need to be equally spaced, one on each side of the bag.) I then took the band back off of the bag and installed the grommets. (Remember, the grommet does not go through both sides of the folded band, only one side. The band is the pocket for your drawstrings.)

Then I just sewed the band to the top of the bag, catching the ends of the lining and the sweater inside the band. After that it was time to put the drawstrings in.
This was a little complicated to figure out. Actually, I had to call a friend and have her look at her son's drawstring bag and explain to me over the phone how all of the strings went through the band.
You will need two long strings. Each string should go in to the band on one side of the bag, travel all the way around the bag and back out THE SAME HOLE that it went in. (One string entering and exiting on one side, the other string entering and exiting on the other side.)
Then one end of the string on each side needs to go through the hole in the tab at the bottom. Take the ends of the strings and tie them in a knot near the bottom tab.
That's it! It was a really simple project and a great way to use up old sweaters and fabric remnants. It would be an even easier project if I hadn't used a sweater. A sturdier, tighter knit fabric would not have needed a lining. With a simple canvas fabric you could just hem the top and run your drawstrings right through there, eliminating the need for a band. I may make a couple more of these bags using different fabrics to see how it goes.
For now, I hope Gracie enjoys her 4th Birthday present. Kinley didn't want to let it go.

Wednesday, June 10, 2009

Sunny Sewing

Due to our negligence and raising a border collie puppy, we have no good lawn chairs. All of them have been rotted by the weather and chewed up.

Sitting outside in the evenings watching the kids splash around in the baby pool or play baseball is no fun when you have to sit on the hard wooden steps or the ground. Laying out to get a little sun is out of the question too. So I decided to do something about it.

At a Memorial Day Sale fabric sale I got three yards of cheapo white terry cloth, with the intention of making a cover for my lounge chair (the only one even close enough to still holding together to make it worth the effort.)

I started by doing some very technical duct tape repairs. Then I traced around the chair took some careful measurements .

I sewed pockets on each end and two tie straps in the center then slipped it over my chair.

The whole project took about 30 minutes and it turned out perfect for a little sunbather.....
....or two.
Of course it has rained almost everyday since then so I haven't been able to try it out yet...but I'm looking forward to putting it to good use very soon.


Wednesday, June 3, 2009

Ella Kaelin

I'm an aunt again.

My fifth niece was born on May 18th waaaaaaaay out in Pittsburgh, PA, so I haven't seen her yet.

I haven't even seen any pictures of her yet. But I hear she is a real cutie, so I'll just have to take her parents' word for it.

Of course I had to make her something cute to welcome her to our family. I found some super cute flannels at the Memorial Day fabric sale at Jackman's and decided to make her a set of the two sided flannel burp cloths I've shown you before here. But this time I left off the flower, which I've found doesn't stand up in the wash very well.

Over at homemade by jill I saw similar burp cloths with a rag edge. I decided to make two plain and two rag edged.
I mixed and matched the patterns so they are all cute on either side.


Also at homemade by jill I saw a cute little vinyl bib pattern and got inspired to make little Ella a bib as well. (Sorry, forgot to rotate the pics.)


This didn't turn out exactly as I had planned, but it's still cute. It was supposed to have purple piping around all of the edges....and I made one like that. It was much cuter than this version except for the neck hole. The turn was just so tight that it was a mess trying to get the terry cloth backing, vinyl covered fabric front and piping to lay flat. I would have had to *gasp* hand sew it. I DON'T HAND SEW. So I just made another version without the piping.

I made all of these goodies (and the aforementioned bib failure) one morning and got them in the mail to Pitt that afternoon. These are such simple, cute and easy baby gifts (especially for babies like Ella that really don't need anything because they have big sisters that have handed down all of their clothes, toys, accesories, etc.) that I make them frequently and give them away. You can't go wrong with burp rags and bibs.

Although, I have heard tales of babies that don't spit up much. I've even witnessed parents walking around carrying their babies without so much as a tissue between themselves and the little tyke. I've never personally experienced anything like that. I carried as many burp rags as I could fit in a jumbo diaper bag plus several changes of clothing for the baby and one change of clothes for me.

Yeah. It was that bad. All three times.

Nursery workers at church actually called my son, "the spitter" and wore special (aka old) clothes when they had to work in his room. Brian never touched one of our kids in the morning before school or church. He just couldn't take the time to change clothes before heading out the door. You should see the way he still cringes everytime someone hands him a baby. Old habits die hard.

Boy, I don't miss those days. I can still smell it. Ugh!

Wednesday, April 22, 2009

Easter Finery

Contrary to what this post said, I didn't completely forget about my Easter dress. I did end up finding some fabric eventually and making a really cute dress. (Unfortunately this is the best picture I have of it. Yes, I am talking instead of smiling, but Kinley had her eyes open...so we went with this shot.)

This one was much easier than the jacket I made last year. It literally only had 6 pieces and was a snap to put together. The only thing that made it a little more dificult was the fabric. It was way too shear so I had to essentially make two dresses, one as a lining for the other one. But other than that is was no big deal at all. I didn't even break a needle!!
Here are all 3 of the kids on Easter morning....after the infamous egg hunt. Can you tell we went with a teal theme this year?
I do have a question for you sewing types out there though. If you don't have a dressmakers dummy how do you sew based on measurements?

I didn't fit all 3 measurements for any one size listed on the back of the pattern, so I made the one I thought would be closest, but I still had to take it in by 4 inches on the top. Could I have avoided this? Is there a way to translate your actual measurements to a pattern before cutting out the fabric pieces?
I've never had a sewing class or anything so I usually just fly by the seat of my pants and follow the directions as best I can, but sometimes I just really don't know alternate ways to do things. Any help?

Friday, April 17, 2009

I've Got a Whole New Bag

I went in to JoAnn Fabrics a while back to see if they had any material that would work for my Easter dress. I ended up falling in love with a purse they had hanging in a display. I bought the pattern, two styles of fabric, and forgot about the dress.

I made this bag instead.

It has four pockets on the inside and two on the outside. Its perfect for easy access to my cell phone and keys. I also really loved the big button and the loop closure. The handles are too short to go over my shoulder....which is inconvenient sometimes, but other than that I love it!

I've already got orders for two more in different fabrics. This bag is irresitible.


Wednesday, January 14, 2009

Do-It-Yourself

I just found the coolest thing!


Well, it's cool if you are a purse addict like me.


I can't justify buying any more purses when I already have so many. I've even given up getting my purses at consignment shops. I just really don't need anymore. But I still like to LOOK.


Anyway, have you heard of Miche Bags? They are a simple black or brown bag with exchangable covers. You can buy one bag and then change the look of it as much as you like. What a great concept!


Their bags are sold in retail stores (mostly smaller salons and boutiques) and through home demonstrations and shows. The average bag costs $35 and each "shell" costs $25. That is too pricey for me.

But I got to thinking....."I bet I can make something like that myself."


I've made lots of purses before. That should be no big deal. The shells are just held on with super strong magnets, and luckily I have access to a physics teacher that plays around with magnets that will hold things through a human hand. So why not?


I think it'll be my next project.

Now, don't tune in to the blog next week and expect to see the amazing new "Crystal Bags". It'll take me awhile. But I'll keep you posted.


In the meantime if you want to check out Miche Bags click here.

I found retailers nearby in Highland, Effingham and Marion, Illinois if you'd like to see some of their merchandise in person.


Note: All purses pictured in this post are Miche Bags.

Thursday, January 8, 2009

Christmas Projects

I made a few items for gifts this year, but this project was by far my favorite (to look at, not necessarily to make...it was actually really hard!). I made my sister-in-law this laptop case.

I absolutely loved this fabric! The case is padded and zips closed. I gave it a pink lining and a pocket on the inside too. I even put a cute little leather flower on the zipper pull.
She seemed to really like it. (I was kind of hoping she wouldn't so that I could keep it for myself....even though I don't even have a laptop. ha ha ha)


I also made about 20 of these fleece ear warmers. They were super simple and cute so I made them for all of my cousins (pictured) and all of Brian's cousins.

I love them because they don't mess up your hair like a stocking hat does, you can wear a ponytail with them and you can wear them over a ballcap. I made some pretty flowered ones for the girls and brown camo ones for the boys. I had less than $1 in each of them.

And of course as I was shopping for fabric I came across these adorable prints and patterns so I just couldn't resist making this shirt/dress for Kinley too.